How to paint Blood Angels – Part I
UPDATE: After three years and lots of positive feedback, this guide has been superseded by a new version, available to buy as a PDF download in the shop. The process has been reviewed and streamlined to help you get models on the table quicker, and new paints, colours and techniques explored. I will leave this free version up for anyone who still finds it useful, but I strongly recommend checking out the new version. Of course, the small fee I charge for it will help enable me to continue putting out this kind of content – so thanks for your support!
Welcome to the first in a three-part tutorial on how I paint my Blood Angels. Check out Part II here where we cover detailing the model, and Part III here which gives an overview of the finishing touches.
Lots of people have asked me how I paint the red armour on my Blood Angels. I posted a tutorial on how I did my Drop Pod using colour primers (here), but I’m always trying new things and striving to improve and perfect my process. More recently I’ve been using Vallejo Model Air paints instead of primers to achieve more extreme shadows and highlights and give more contrast to the models, so I think it’s time for another tutorial…
Our subject will be a basic tactical marine.
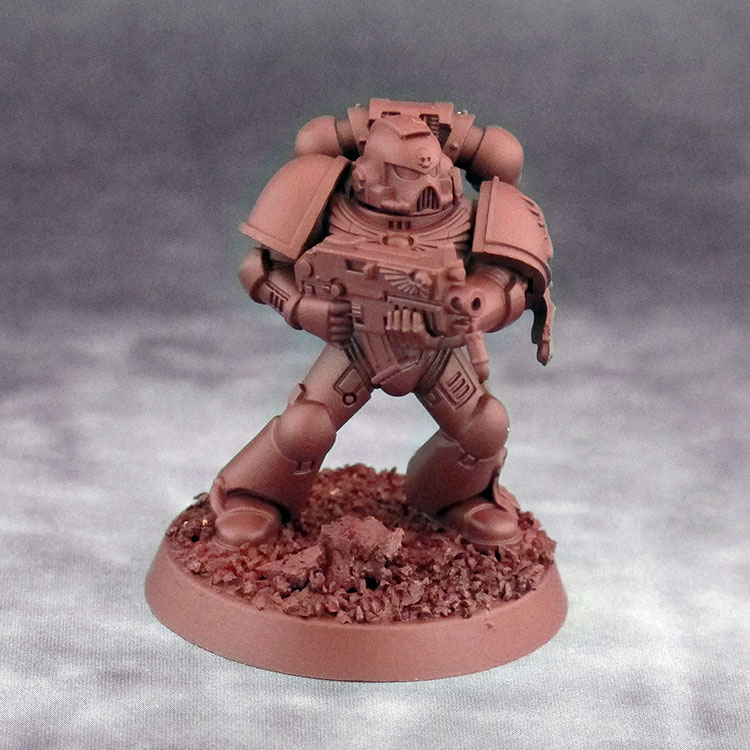
Step 1
Prime the whole model Vallejo German Red Brown (605)
Step 2
Shadows are sprayed with Vallejo Model Air Dark Sea Blue (71087). This was experimental, replacing the black I used to use, and I think an improvement. Highlights sprayed with Vallejo Model Air White (71001).
Note: You can go back and forth with these colours and the primer until you’re happy. I also have the torso attached to the legs with Blu-Tack only so I can get to all parts easily.
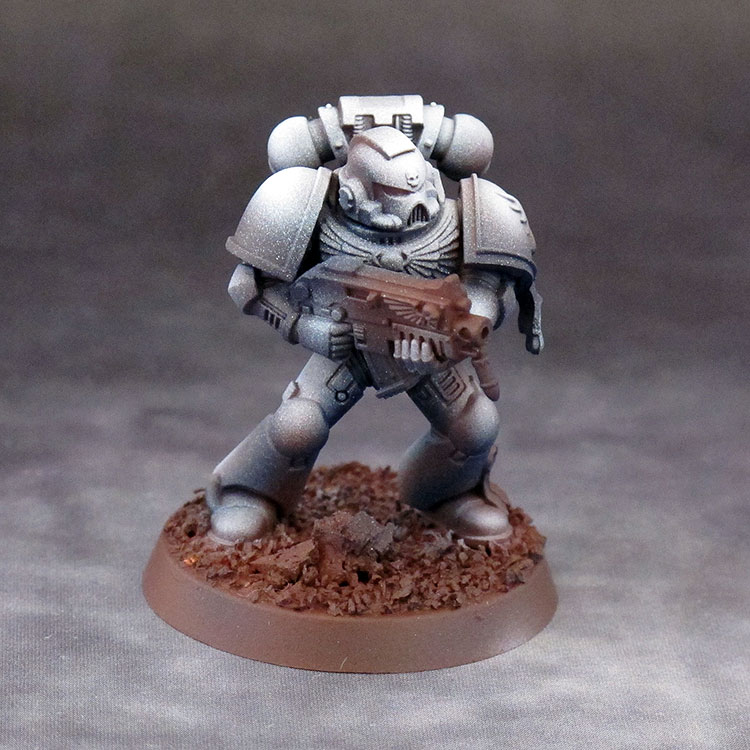
Step 3
This is a new addition to the process, something that I’ve been meaning to try and it worked out pretty well. I applied Citadel Drakenhof Nightshade into cracks and crevices to exaggerate the shadows, and some extreme highlights with Vallejo Game Color Dead White (72001) to increase the contrast. You can be fairly rough here as the next layers of yellow and red will smooth and soften the effect.
UPDATE: On reflection I would say that this step makes only a negligible difference to the end result. You may want to experiment with it on characters etc, but for rank and file troops I would say you can safely skip it and move on to Step 4.

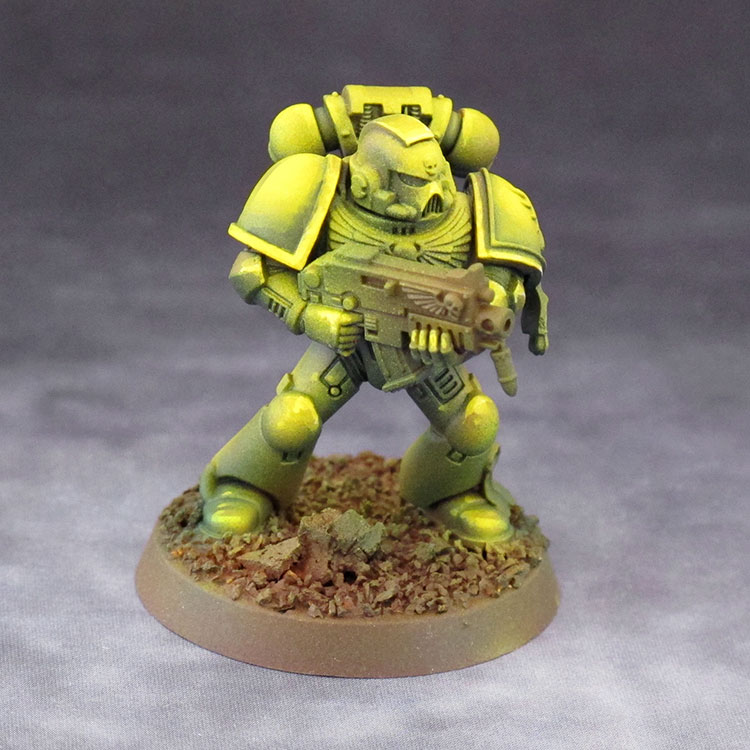
Step 4
Vallejo Model Air Medium Yellow (71002) all over – a couple of light coats until you have even coverage.
Step 5
Vallejo Model Air Red (71102) all over – again, light coats until you have even coverage.

And that’s it for the basic red armour! Because of the shading wash and brush highlights applied in Step 3, I find there is no need for the gloss varnish and black ink wash that I used to do after Step 5, making the process quicker overall.
Next I will paint the non-red areas and finally give the armour some edge highlighting. I will be back with Part II of this tutorial covering those steps soon.
Happy painting!