How to magnetise an Imperial Knight
Admittedly I’m a bit late to the party here – there are loads of tutorials online on this subject, including those dealing with the newer Crusader / Warden Knight kit. However when I finally got around to building my first Knight and watched a few videos I picked out a few things I thought could be improved, so perhaps there is room for one more. No doubt there will be things that can be improved still, so if you have and pointers from your own experiences please post a comment. As I mentioned I’m using the original Paladin / Errant kit but the principles are the same for the Crusader and Warden.
Step 1
I built the legs completely except for the armour panels and banner which will be painted separately. I then sawed off the nub on top of the dome and sanded the piece flat until I reached the cog-symbol outline, then glued a 10mm x 1mm magnet on top.
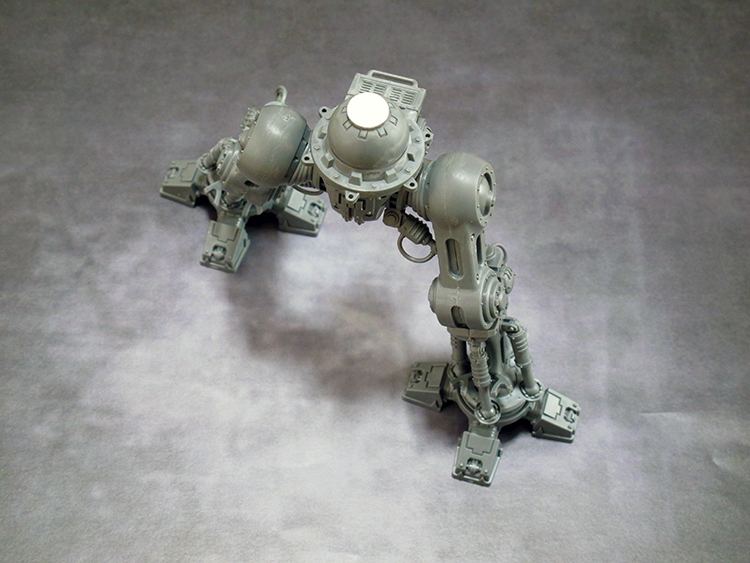
I also filled two of the ‘toes’ on each foot with green stuff and, when cured, drilled holes and inserted pins cut from large paperclips to fix the model to a cork base.

Step 2
To magnetise the torso to the legs I glued a piece of plasticard on the inside of the torso assembly to cover the hole at the bottom, then filled the underside with green stuff and embedded a 10mm x 1mm magnet corresponding to the one on top of the legs.

Step 3
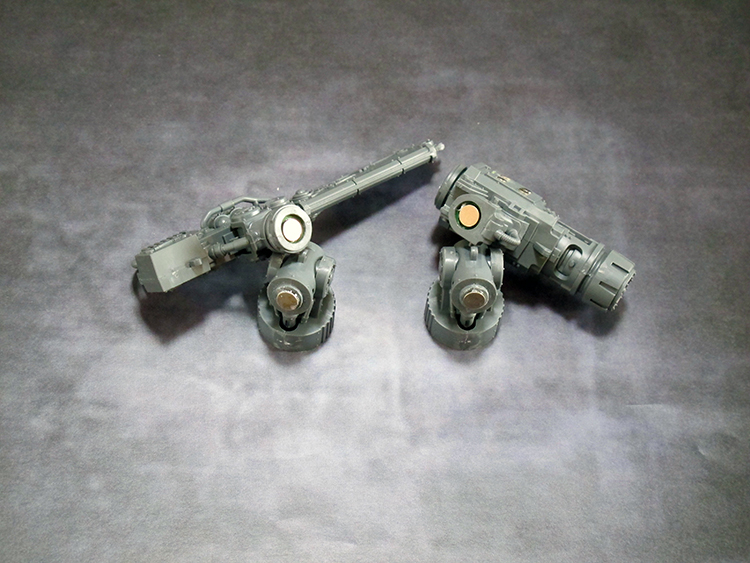
I sawed the bottom-most piece off the upper arms, sanded them down and glued a 6mm x 1mm magnet onto each. I then filled the cavities of the weapon mounts with green stuff and glued the corresponding magnets into them, slightly recessed to allow for the upper arms to sit inside slightly.
Step 4
For the ammo feeds I drilled four 3mm holes in the gun mount (working up from 1mm pilot holes), glued a piece of plasticard to the inside and glued 3mm x 1mm magnets into the recesses. Once the glue was dry I attached the corresponding magnets to each, filled the ammo cases with green stuff and pressed them against the mount to embed the magnets. I repeated this for each ammo feed.

Step 5
To achieve swappable weapon types I opted for plasticard telescopic tubing rather than magnets (an idea I got from Geeks40k YouTube channel). The tubes are from the Gale Force 9 Plastic Accessory Variety Pack.
First I glued a piece of the largest tube into the weapon mount making sure it was straight as it dried and sawed it off flush with the mount. I then glued the next size tube (which fits snugly) inside the first and again sawed it flush. Then I used the third size tube and glued into each of the weapon front-ends. I had to trim the inside of the thermal cannon slightly with an Xacto knife to fit it in.

Step 6
Lastly I drilled through the small hole where the missile launcher and AA gun (from the Crusader / Warden kit) are mounted using a 2mm bit. I then glued a 6mm x 1mm magnet to the inside of the carapace in case I want to add these weapon options later.

And there you have it – a fully magnetised Imperial Knight!

