How to apply decals with Microset and Microsol
In this tutorial we’ll cover the application of decals / waterslide transfers using Microset & Microsol for the ‘painted on’ look.
What are Microset and Microsol?
Microset
Micro Set slightly softens the decal film to make it more flexible so that it will conform better to the model’s surface. Better adhesion of the decal to the model prevents tiny air bubbles from forming and results in an invisible carrier film for the so-called ‘painted on look.’
Microsol
Mirco Sol setting solution is for the most difficult irregular surfaces to be found on models. It completely softens the Microscale Decal, allowing it to drape down onto the surface of the model, comforming perfectly to surface irregularities without distortion.
More information can be found on the manufacturer’s website, Microscale Industries.
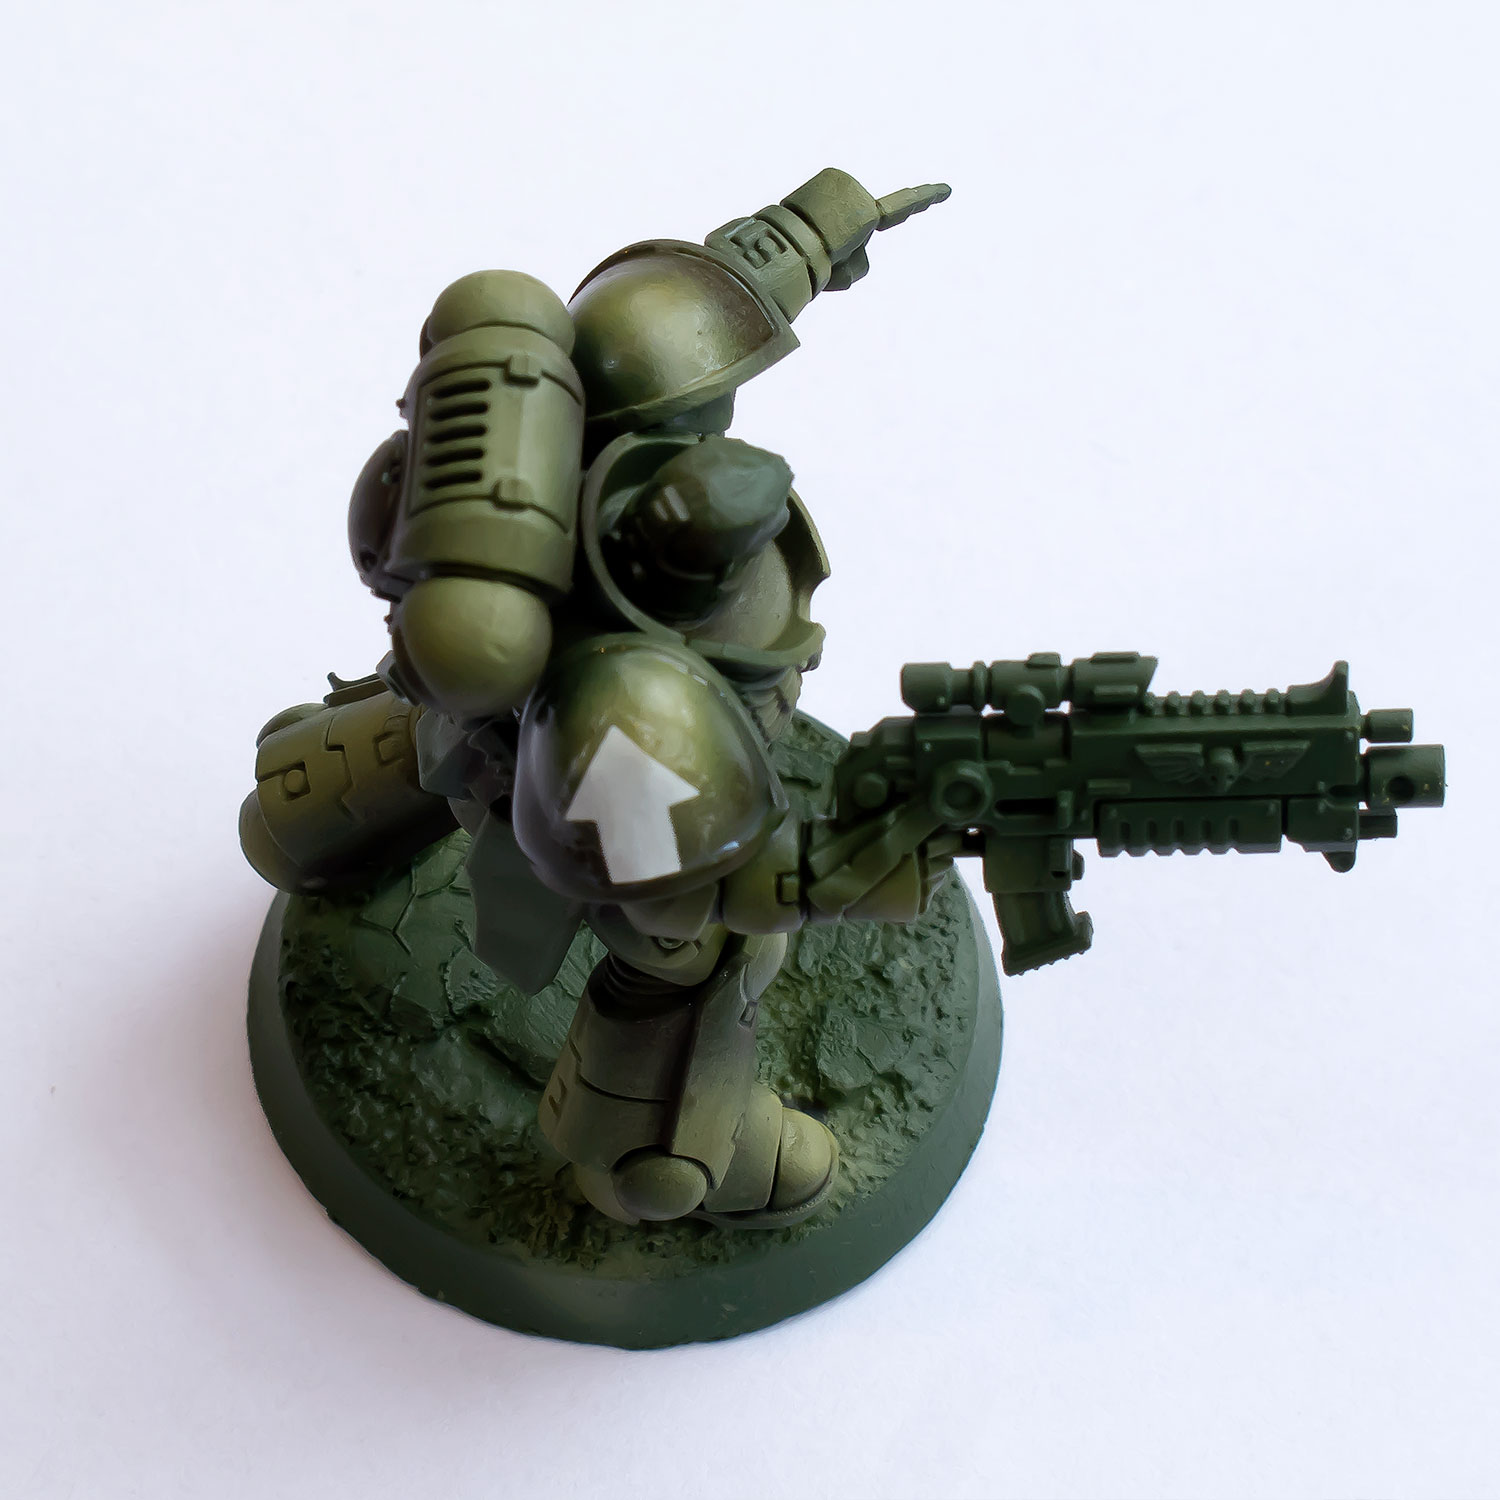
As described above, Microsol is mainly for complex surfaces and isn’t always required for small or simple decals, but it can be useful when working with curved surfaces, like the Space Marine shoulder pad in our example here.

Step 1
First apply gloss varnish to the area where the decal will be positioned. This step is crucial, and if you encounter problems such as a visible border or air bubbles, it’s most likely that the surface was not smooth enough – so make sure you get a good glossy finish to begin with!
Allow to dry completely.

Step 2
Cut the decal out from the sheet with a hobby knife and, gripping with a pair of reverse action tweezers, dip it into water for a few seconds and set aside. The exact length of time the decal needs to be submerged in water depends on various factors, including the age of the sheet. 10 seconds is normally enough, but if it doesn’t slide off easily just put it back in for a few more seconds.
Step 3
While the decal is soaking and lifting from it’s backing, brush some Microset on to the area where the decal will be applied.
Slide the decal off it’s backing on to the model and position using a paintbrush. Brush some more Microset over the top, and then leave for a few moments to soften.

Step 4
Using a moistened (but not wet!) cotton bud (Q-Tip), very gently press the decal down on to the the surface, removing the excess fluid and flattening / smoothing the decal as you go. Tamiya cotton buds are good for this because they are very tightly wound, and there is less chance that cotton fibres will come off and stick to the decal.
If there are stubborn creases or air bubbles that won’t flatten, carefully prick them with a pin or the point of your hobby knife and apply Microsol to the decal. You can repeat this as many times as required until the decal is completely flat, allowing it to dry fully between each coat.

Step 5
When you’re happy that the decal is completely flat, apply another coat of gloss varnish to seal it. At this point the film border should be completely invisible.
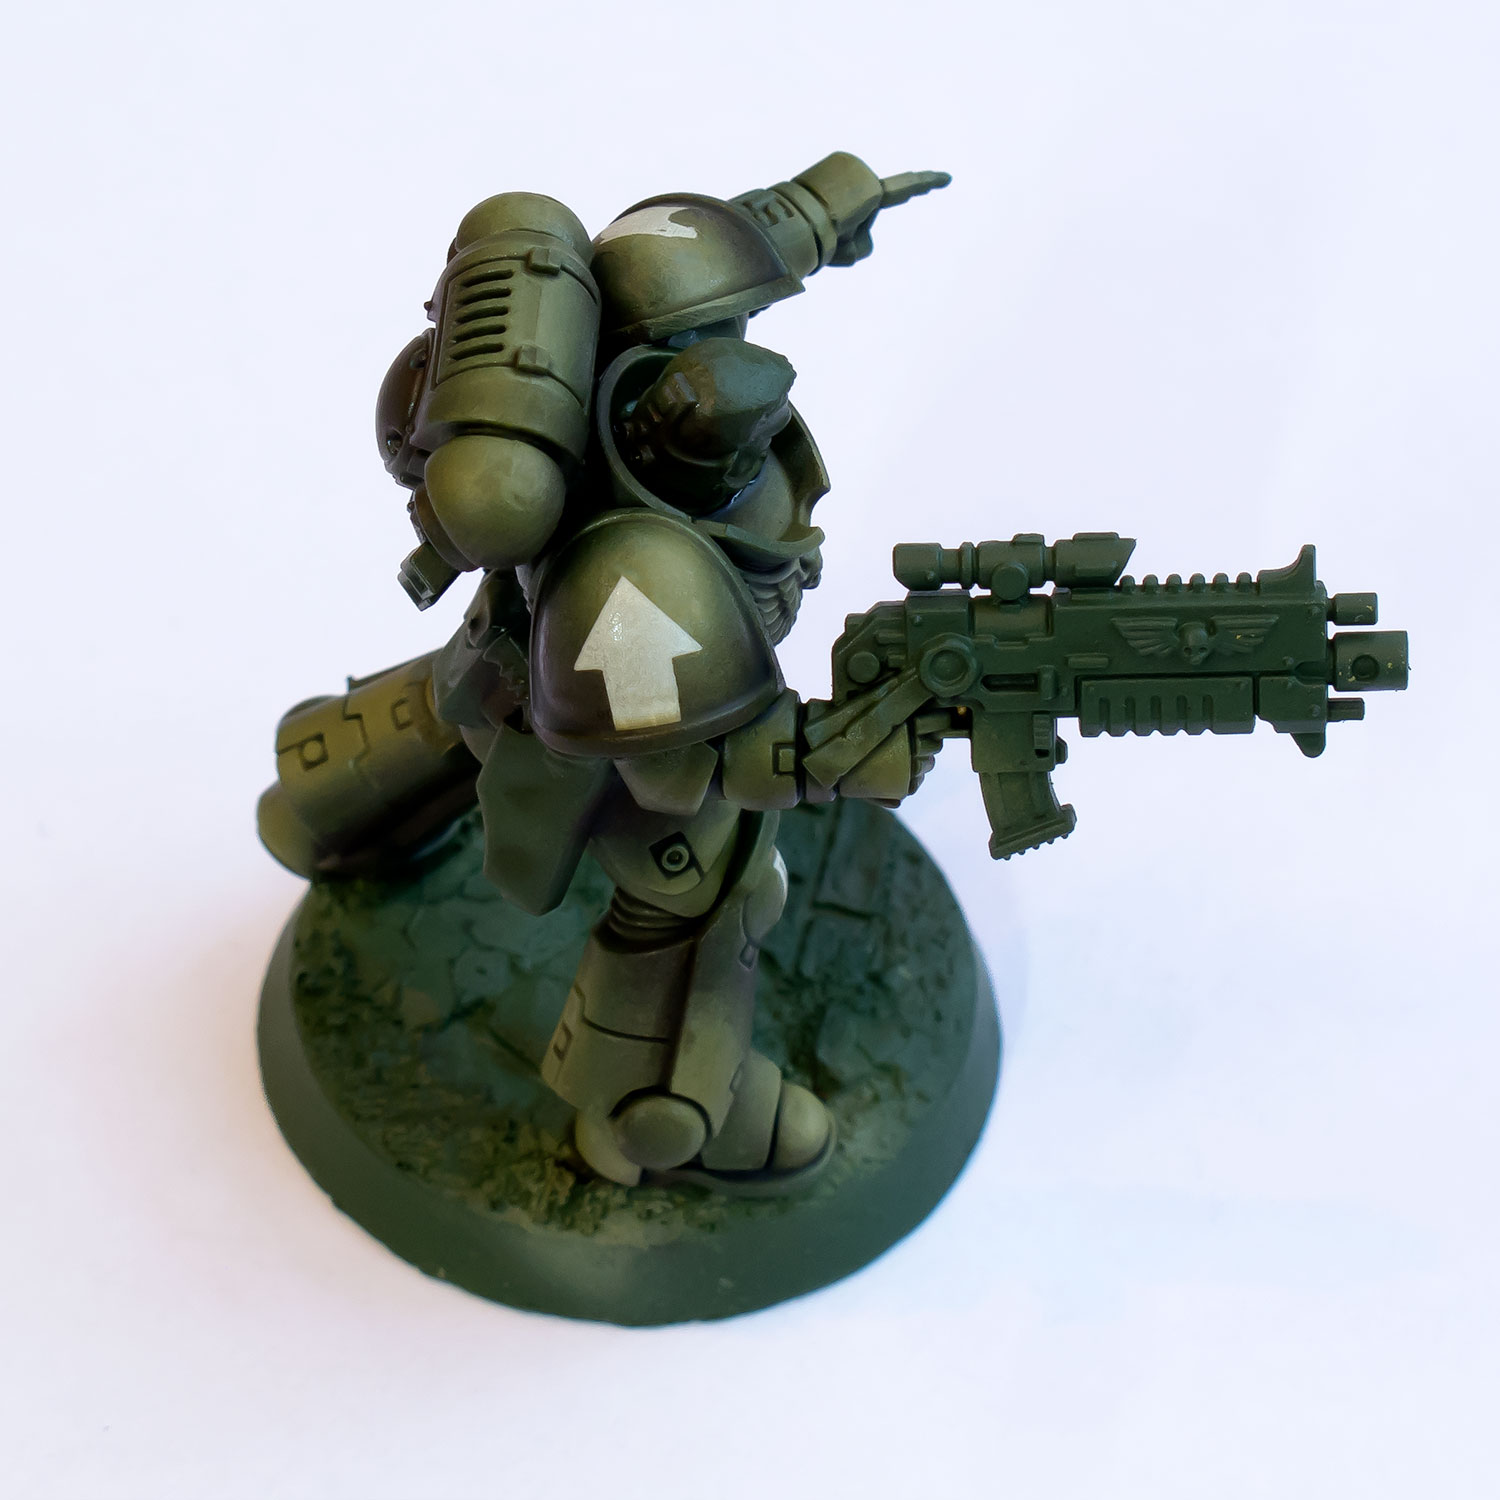
Step 6
If I’m going to be using shading washes on the model I normally do so after applying the decals, to blend them in and provide a matte finish. If you’re not using shading washes after applying the decals, you can use Lahmian Medium or a matte varnish to give you the desired finish.
And there you have it – a decal that looks painted on!